Bodypainting with blend modes
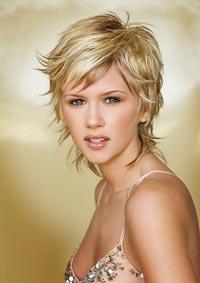 We will start by picking our source images. I've selected a beautiful model (sorry don't have the name or telephone number) and a twirl kinda thing that you can find a tutorial for all over the net. In this tutorial we will bodypaint the girl with the second image using some advanced blending techniques.
The model picture looks a little too bright for me so i'll use the levels command to darken it a little bit.
 Open the twirl image or make your own. Select all (Ctrl +A) and copy it (Ctrl + C) in the model image. Use the transform tool (Ctrl +T) and rotate if you have to make sure you cover most of the skin. Double click in the layers pallete on the twirl layer to get the blending options dialog.
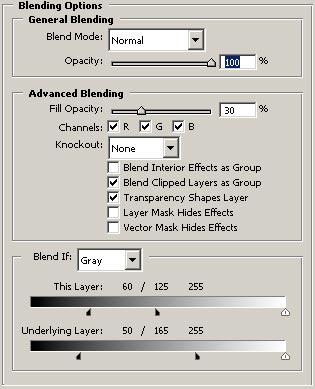 We use a normal blend mode on this layer, with a 30% fill opacity and the rest of the "Blend if" settings you can spot in the image. You must hold the ALT key pressed to move the sliders apart from each other.
We use "Blend if" because we want the darker bits of the image (eyelashes and eyebrowns) to stand out.
Feel free to play with the settings to get the results you like the most.
 Now add a layer mask to the twirl layer and start painting with a black brush on the parts that you don't want blended in with your image, like mouth, eyes, dress, etc.
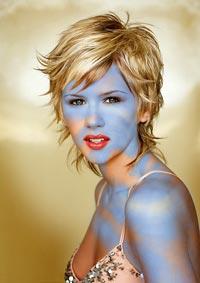
After you are satisfied with the image duplicate the twirl layer (Ctrl +J) and set it to the "Color" blend mode and 50% fill opacity to preserve a little more color from the twirl image to the model's skin.
This is the final image.
Save to Del.icio.us |
Furl It | Digg
| Permalink ![]()
![]()